


Last Updated: February 5, 2026
Keeping a record of abusive messages or online behaviour can be important for legal reasons. This sheet explains how to safely take and store screenshots as evidence.
If something in this guide is no longer up to date, or you have any questions, please reach out to techsafe@bcsth.ca with your concerns.
Table of Contents:
- Before You Begin: Safety First
- What Is a Screenshot?
- How To Take a Screenshot
- If You Cannot Take a Screenshot
- What to Include in Your Screenshots
- Printing and Storing Your Evidence
- A Note About Snapchat and Disappearing Messages
1. Before You Begin: Safety First
Before taking screenshots, think about whether the abusive person can see what you’re doing.
They may have access to your device if:
- They know your passwords, account log in, or cloud storage.
- Examples: iCloud, Google Drive, Dropbox.
- They have physical access to your device.
- Your device may be monitored with spyware or Stalkerware.
If they can see your photo files or get alerts about screenshots, they may learn you’re collecting evidence.
If you think your device or accounts may be monitored, consider:
- Using a different device to capture evidence.
- Talking to an anti-violence worker for a safety plan.
- Reviewing Safety Considerations for Preserving Digital Evidence.
2. What Is a Screenshot?
A screenshot is a picture of what you see on your smartphone, laptop/computer, or tablet screen. It can capture:
- Text messages.
- Social media posts.
- Photos or videos displayed on-screen.
Screenshots only show what’s visible at that moment, so you may need several to capture a full conversation.
3. How to Take a Screenshot
If you aren’t sure how to screenshot your device, you can search online for:
“How to take a screenshot on a [your device name]”
Mac Computer
Screenshot information from: Apple Support.
There are three ways to screenshot on a Mac: Screenshotting the entire screen, a select portion of your screen, and opening the screenshot app.
Screenshotting the Entire Screen
On your keyboard in this order, press Shift, Command, and 3.
Select Screenshotting
On your keyboard in this order, press Shift, Command, and 4.
Screenshot App
This method offers more options like screen recording or capturing a specific window.
On your keyboard in this order, press the Shift, Command, and 5.
How to open the screenshot file locations:
- Open the Desktop Folder.
iPhone
Screenshot instructions from: Apple Support.
How to Screenshot on iPhone 14 and Other Models with Face ID
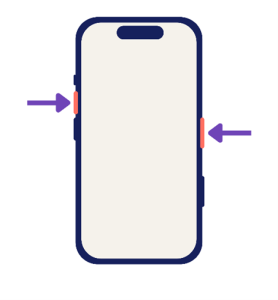
- At the same time, quickly press and release the side button and the volume up button.
- After you take a screenshot, edit, share, or save it.
- In iOS 18 or earlier, a thumbnail temporarily appears in the lower-left corner of your screen.
- Tap the thumbnail to open it or swipe left to dismiss it.
How to Screenshot on iPhone Models with Touch ID and Side Button
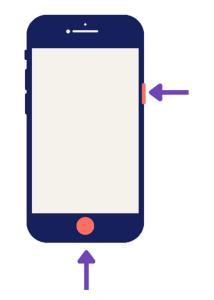
- At the same time, quickly press and release the side button and the Home button.
- After you take a screenshot, edit, share, or save it.
- In iOS 18 or earlier, a thumbnail temporarily appears in the lower-left corner of your screen.
- Tap the thumbnail to open it or swipe left to dismiss it.
How to Screenshot on iPhone Models with Touch ID and Top Button
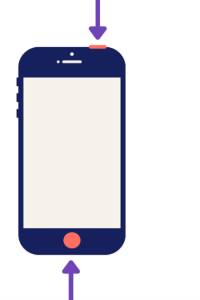
- Quickly press and release the top button and the Home button at the same time.
- After you take a screenshot, edit, share, or save it.
- In iOS 18 or earlier, a thumbnail temporarily appears in the lower-left corner of your screen.
- Tap the thumbnail to open it or swipe left to dismiss it.
How to open the screenshot file locations:
- Open
- Tap
- Scroll to find Media Types.
- Tap
To find other models of your iPhone that aren’t mentioned here, visit the iPhone User Guide.
iPad
Screenshot instructions from: Apple Support.
How to Screenshot on an iPadOS 26
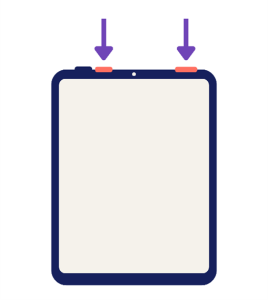
- In a fast way, press and release the top button and either volume button at the same time.
- After you take a screenshot, edit, share, save, or cancel it.

How to Screenshot on an iPad with a Home Button
- In a fast way, press and release the top button and the Home button at the same time.
- On the lower-left corner of the iPad screen, tap the screenshot thumbnail.
- After you take a screenshot, edit, share, save, or cancel it.

To find other models of your iPad that aren’t mentioned here or to view other screenshot options, visit the iPad User Guide on how to take screenshots.
Windows Computer
Screenshot instructions from: Microsoft Support.
Two ways open the screenshot tool on a Windows Computer using your keyboard:
- Press the PrtScn, Print Screen, or PrtSc key on your keyboard.
- In this order on your keyboard, press the Windows logo key, Shift key, then S
Both of these ways can open the Snipping Tool, which is a tool that allows you to screenshot or screen record a specific area, window, or the full screen.
How to open the screenshot file location:
- On your computer, click File Explorer.
- Click Pictures Folder.
- Click Screenshots Folder.
You can also paste directly into a document (e.g., Word or Google Docs) because the screenshot is copied to your clipboard.
Android Phone / Tablet
Screenshot instructions from: Google Support, Samsung.
Note: If none of these instructions work on your Android device, search ‘How to Screenshot on [insert Android device name]’ online.
There are four ways to screenshot on an Android: Button Press, Quick Settings Screenshot Icon, Voice Assistant, and Palm Swipe Gesture.
Button Press
- At the same time, press the Volume Down Button + Power
Quick Settings Screenshot Icon
- Swipe down twice from the top of the screen to fully expand the Quick Settings
- Find and tap Screenshot icon to take a picture of the current screen.
Note: If you can’t find the icon, you might be able to add it to your Quick Settings panel by:
- Tapping the pencil icon or the three dots.
- Tapping the Edit button if it’s there.
- Find the Screenshot icon and drag it into the panel before tapping ‘Done’.
Voice Assistant
- Activate your phone’s voice assistant.
- Example: “Hey Google”, “Hey Bixby”, “Hey Alexa”, etc.
- Say, “Take a screenshot” or “Take a picture of this screen”.
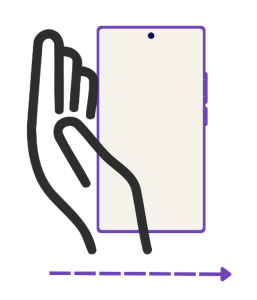
Palm Swipe Gesture
This feature allows you to take a screenshot by swiping the edge of your hand across your phone. The primary Android devices that have this feature are Samsung Galaxy devices.
To enable the Palm Swipe Gesture:
- In your phone, open
- Tap Advanced features.
- Tap Motions and gestures.
- At the bottom, tap the toggle on ‘Palm swipe to capture’.
To take the screenshot:
- Angle your hand on one side of your phone screen so that your pinky and edge of your palm are touching the screen.
- While keeping your palm and pinky touching the phone, slide your hand towards the other side of the phone in one motion.
How to open the screenshot file locations:
- Open Gallery or
- Open Screenshots Folder.
4. If You Cannot Take a Screenshot
You can still preserve evidence by:
Taking a Photo
Use another device to take a clear photo of the screen. This is useful if:
- Your device may be monitored.
- The app notifies the sender when you take screenshots.
- Example: Snapchat.
Recording a Video
Many phones allow video screen recording which may be helpful if you have a lot of texts, messages and other communication to capture.
See Preserving Digital Evidence via Video Screen Recording for more information.
5. What to Include in Your Screenshots
Capture the Whole Conversation
Courts often need context. Try to include:
- The full exchange, not just one message.
- Overlapping messages (bottom of one screenshot appears at top of the next).
Include Who Sent the Messages
On Smartphones:
If you saved the abusive person under a nickname, consider temporarily removing the contact’s name so the phone number appears in the screenshots.
You can also screenshot the contact entry to show the number matches the name.
On social media, capture:
- The abusive message or post.
- The person’s profile name and photo.
- Their username or profile URL.
- Any comments or replies that show harmful behaviour.
Include Time and Date
Many messaging apps hide timestamps (i.e., time and date of messages).
Timestamps help show patterns such as many messages sent in a short time.
- Try pressing or swiping on a message to reveal the time.
- You can also capture the device’s date/time at the top of the screen.
6. Printing and Storing Your Evidence
Printing screenshots soon after capturing them is recommended for court.
Options:
- Print directly from your phone (if you have a wireless printer).
- Print from your computer.
- Paste screenshots into a document (Word/Google Docs) and print.
- Always keep a digital copy in a safe place.
You may want to save to:
- A secure email account.
- An external drive.
- A folder you have sole access to.
A Note About Snapchat and Disappearing Messages
Some apps (like Snapchat) automatically delete messages and may notify the sender if you screenshot.
If you need to capture disappearing messages, consider:
- Using a second device to take photos or record your screen.
- Testing with a friend first to see if the app sends alerts.
- Planning ahead so you can capture messages before they vanish.
If you are experiencing tech abuse, you are not alone. Find support in your community by connecting with a BC Society of Transition Houses Member Program or check out our other safety resources at techsafebc.bcsth.ca.
©BC Society of Transition Houses, Tech Safe BC Project, 2026. We encourage others to share this material, provided BC Society of Transition Houses is acknowledged