

Compiled by Tech Safe BC
Last Updated: February 5, 2026
Current/former partners who cause harm can misuse websites to post non-consensual images or videos, spread harassing or threatening comments, or create fake profiles meant to damage your reputation. Online content can appear and disappear very quickly, so it can help to save copies as soon as you safely can.
This infosheet explains safe ways to preserve information from websites and what to consider if you want to use that information in court.
If something in this guide is no longer up to date, or you have any questions, please reach out to techsafe@bcsth.ca with your concerns.
Table of Contents: (You can click a section to jump directly to that part of the guide)
- Safety Check
- Ways to Capture Website Evidence
- Save Backups
- Saving HTML
- Tips for Preserving Website Evidence
Safety Check
Before saving anything from a website, think about your safety.
Saving evidence could alert the abusive person if they can see activity on your device. This may happen if they:
- Have physical access to your phone or computer.
- Know your passwords.
- Can access your cloud storage (iCloud, Google Drive, Dropbox)
- Installed spyware or Stalkerware.
If you think your device, accounts, or files are being monitored, make a plan to collect evidence without being detected. This helps protect your safety and prevents the abusive person from deleting evidence.
See Safely Preserving Digital Evidence of Technology-Facilitated Violence and consider reaching out to an anti-violence worker for support.
Ways to Capture Website Evidence
1. Screenshots
If you can’t screen-record, take a screenshot or a series of screenshots of the webpage you want to save.
For more details, see Preserving Digital Evidence via Screenshot.
2. Print to PDF
On a computer, you can save a webpage as a PDF:
- Open the webpage you want to save.
- Choose Print (from your browser menu, right-click menu, or by pressing Ctrl + P).
- Select Save as PDF.
- If available, check the Print headers and footers box so the PDF includes the website link, date, and time.
After saving the PDF, double-check that it captured everything you need. Some webpages do not fully load in the Print view.
Other helpful options:
• iOS Safari’s Markup tool can save a full page as a PDF.
• Firefox on Android includes a built-in “Save to PDF” option.
3. Video Screen Recording
This is one of the quickest ways to save what you see on a website.
For full instructions, see Preserving Digital Evidence via Video Screen Recording.
Save Backups
Try to save copies in more than one safe location. You can:
• Print a copy.
• Save the PDF.
• Save screenshots.
• Store backups on a USB drive, external hard drive, or another secure device.
This helps protect your evidence if something is deleted or lost.
Saving HTML (Advanced but Helpful)
The HTML of a webpage shows the behind-the-scenes code that proves content was uploaded. If possible:
1. On a computer, right-click the page.
2. In the drop-down menu, select Save Page As (view screenshot below with yellow arrow).
3. In the pop-up window, select the Web Page, Complete option in the “Save as type” heading (view screenshot below with yellow underline) then click the ‘Save’ button.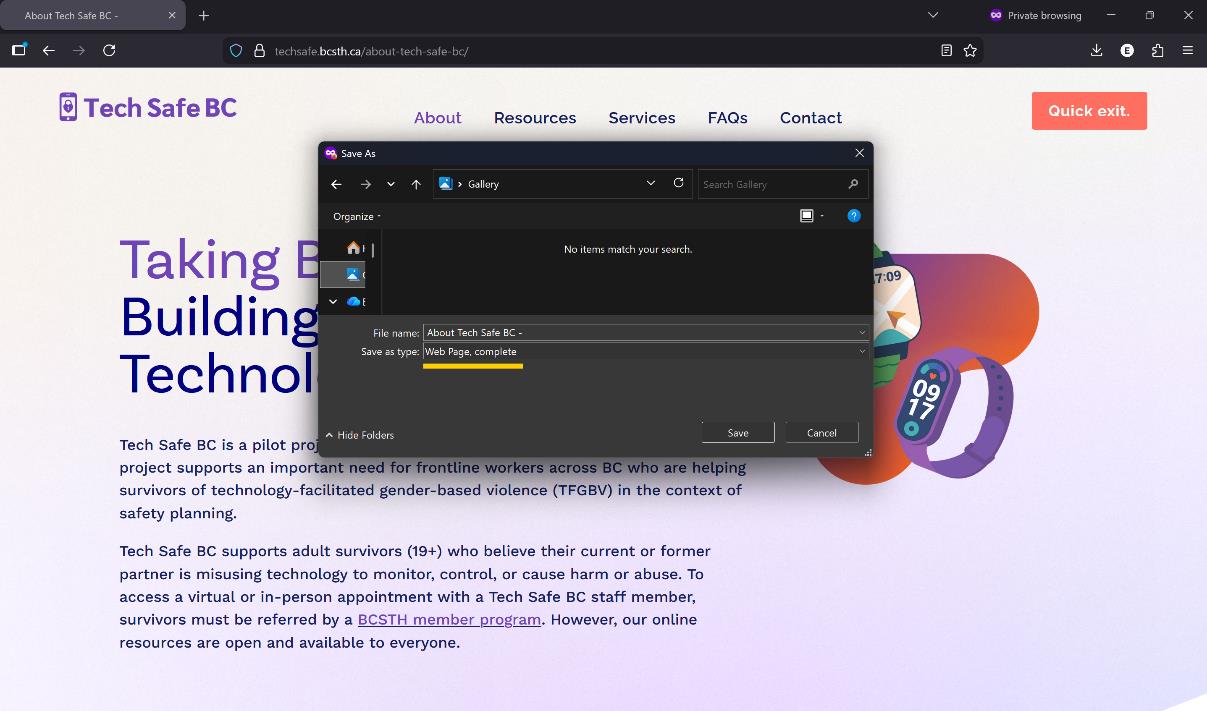
4. Before downloading, take screenshots of the HTML so you have proof in case the downloaded file doesn’t save correctly.
You may need multiple screenshots to capture the full HTML page.
Tips for Preserving Website Evidence
1. Capture the Entire Webpage
Courts may not accept only part of a post or comment. Include:
- The full post.
- All comments (expand them if needed).
- The date and time.
- The URL.
- Any usernames or profile details.
You may need several screenshots or multiple PDF pages.
2. Look for Supporting Evidence
Sometimes courts want more than a screenshot.
For example, on a social media website you may also want to download:
- The date and time of the post.
- The original poster’s name.
- The names of people who commented.
- Related notifications or messages.
A social media app may have a tool where you can download your data or social media history.
3. Include Information About the Abusive Person
On social media platforms (Instagram, Facebook, Snapchat, X, TikTok etc.): Try to capture:
- The profile photo and username of the person who posted or sent the harmful content.
- The profile URL.
- The harmful post, message, or image.
- Any threatening or harassing comments.
- The date and time.
On other websites:
Websites that allow anonymous posting may give little information. Even then, try to capture:
- All visible content connected to the harm.
- Any links, usernames, or timestamps.
- The entire webpage (using screenshots, video recordings, PDFs, or all three).
In some cases, a lawyer may need to request information directly from the site.
If you are experiencing tech abuse, you are not alone. Find support in your community by connecting with a BC Society of Transition Houses Member Program or check out our other safety resources at techsafebc.bcsth.ca.
©BC Society of Transition Houses, Tech Safe BC Project, 2026. We encourage others to share this material, provided BC Society of Transition Houses is acknowledged